Scheduling
Documents can be scheduled to appear on specific days or times. This is referred to as a "Scheduled Event". A scheduled event may be recurring (e.g., every Wednesday) or non-recurring (e.g. on January 1st); a scheduled event may be all day, or between specific times.
The scheduling page can be displayed in month view, week view or day view, which can be selected from the top bottom toolbar.
In week view:
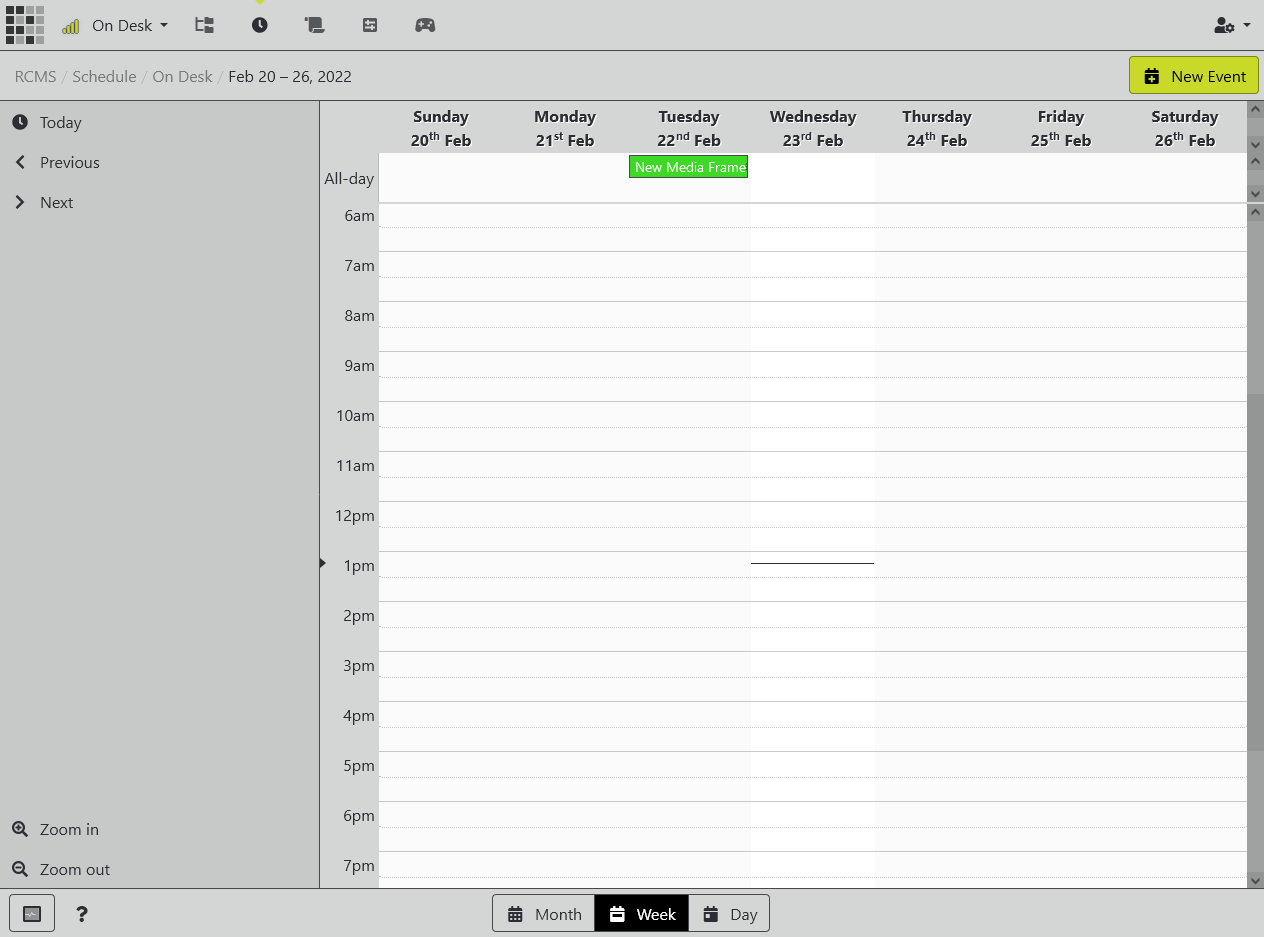
This is the default scheduling view, and displays the current calendar week. Scheduled content appears in the calendar area.
- To scroll the calendar to the current time and date, click the "Now" button.
- To navigate to the previous or next week, click the respective button.
- To zoom the calendar in to finer time increments or out to larger time increments, click the zoom in or out button.
- Documents that appear all day (i.e., from 12:00am until 11:59pm on a given day) appear in the top row of the calendar.
- Scheduled events appear as colour coded boxes with the name of the document shown. Recurring schedules have a "repeating" icon as shown. Scheduled documents with lower priority will be partially greyed out, and documents that have high priority have a red border.
- To see a preview of the scheduled content and description of the schedule, hover your mouse cursor over the scheduled event.
- The current day is highlighted with a lighter background colour.
- The current time ("now" indicator) is shown with a red line.
- To create a new document schedule, click the "New Event" button
In month view:
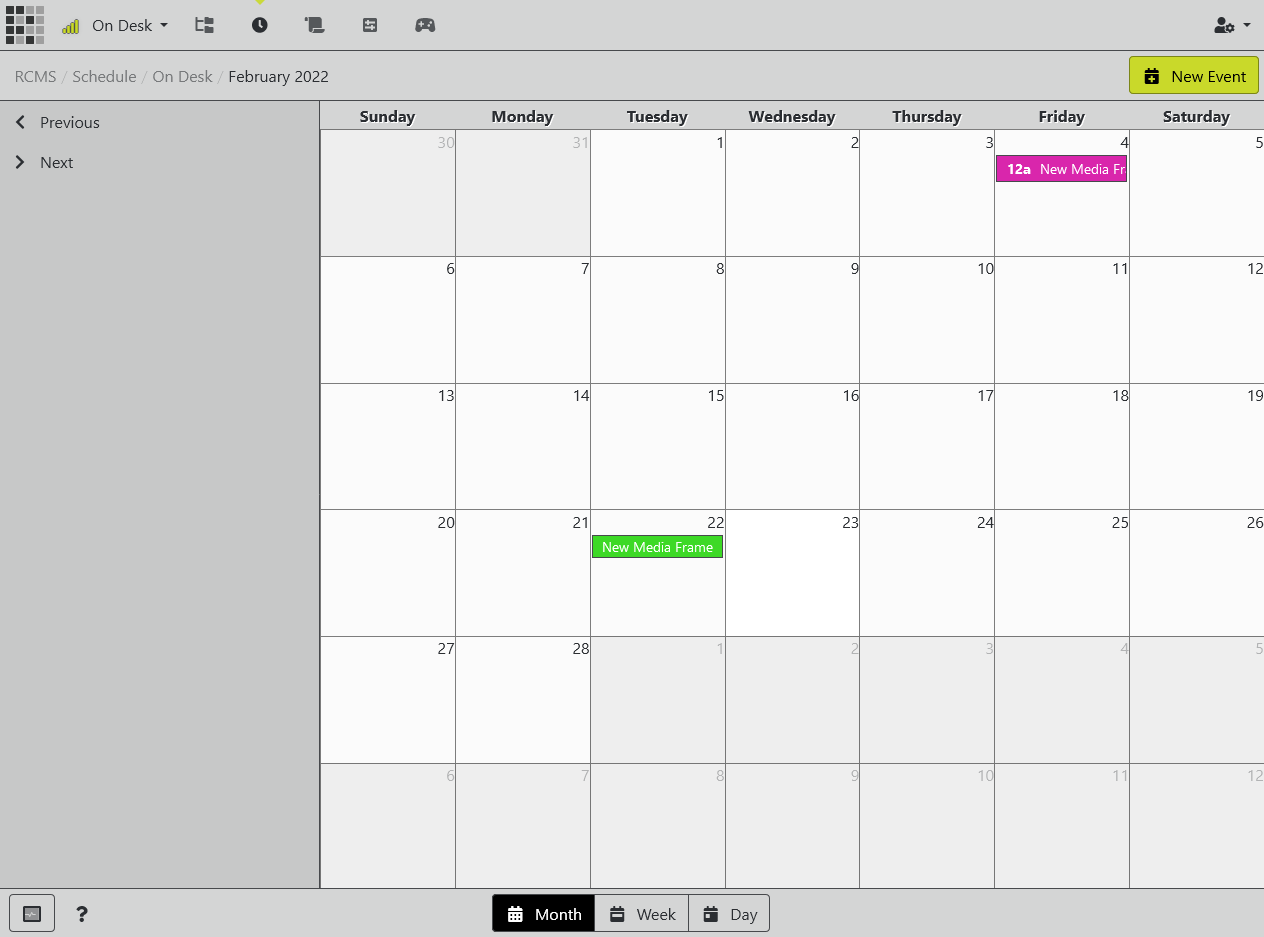
This displays scheduled content over the course of a month.
- To navigate to the previous or next minth, click the respective button.
- The number for the day of the month is greyed out for dates outside of the selected month.
- The current day is highlighted with a lighter background.
In day view:
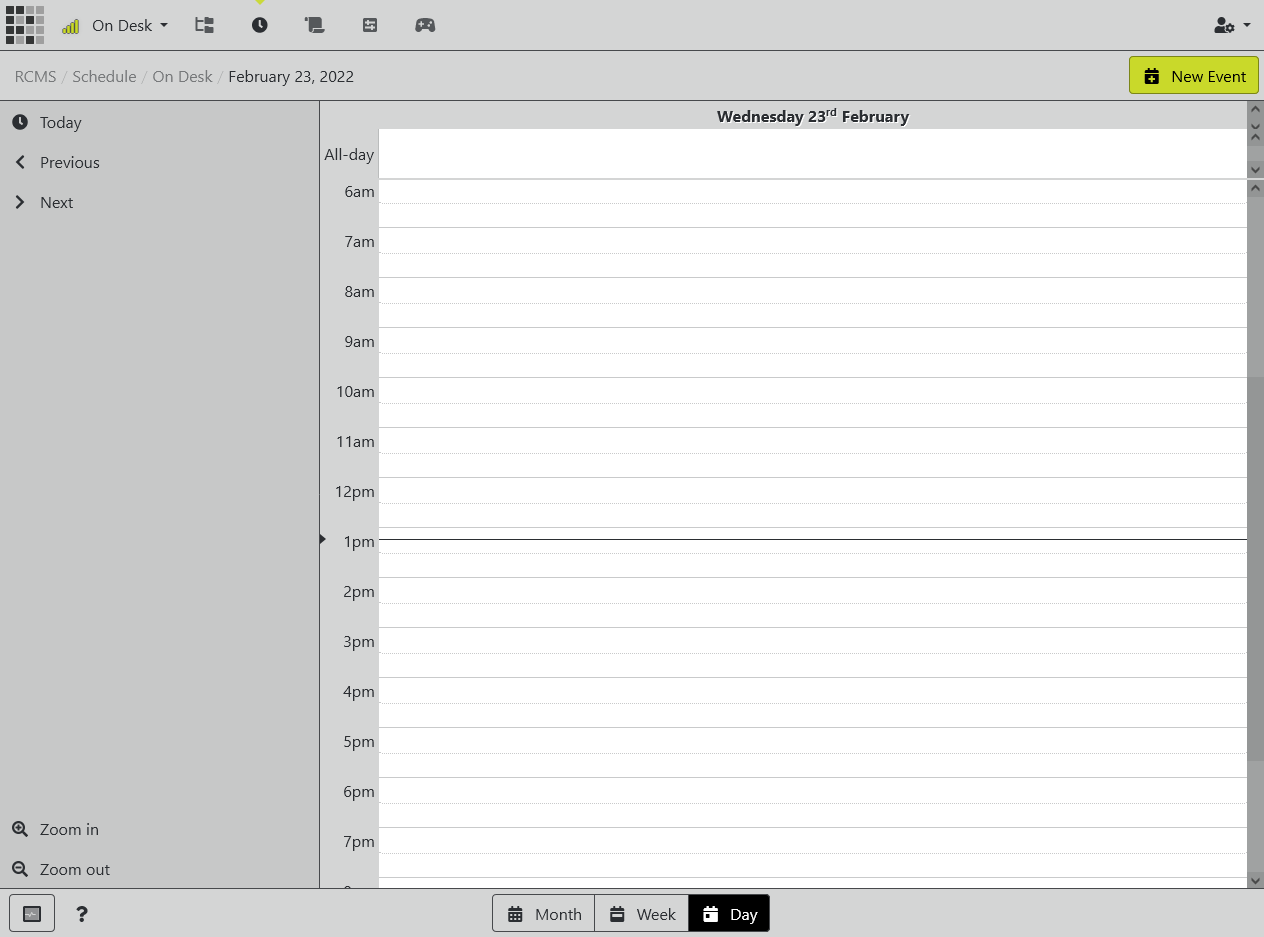
The day view has the same controls as the week view but only for the selected date.
Adding a Schedule
There are multiple ways to schedule a document to appear. On mobile devices, click the "New Event" button.
First, select a document to appear.
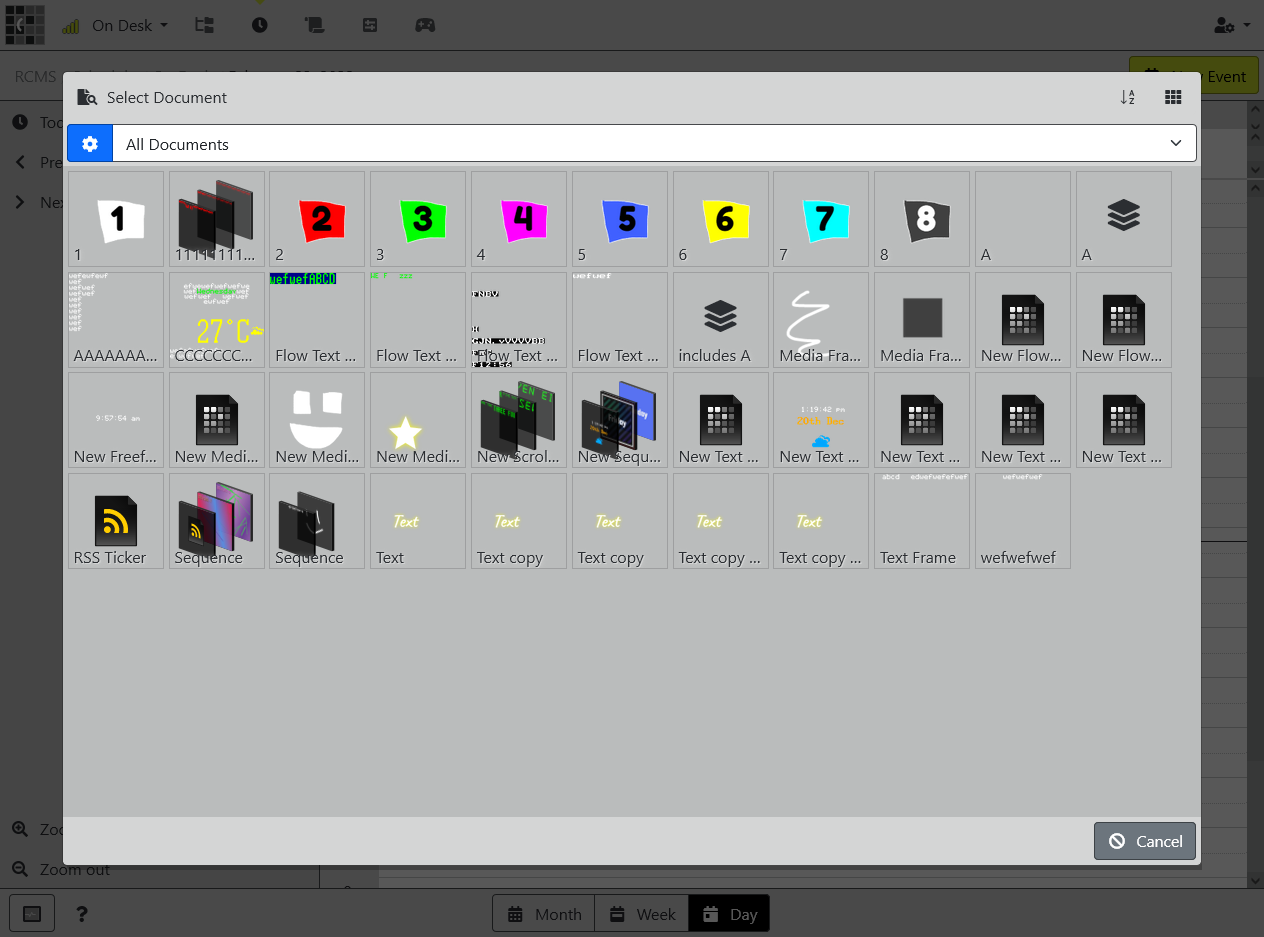
This will then open the "edit schedule" dialog.

- Click this button to change the document that will be displayed.
- Select the display priority from low, medium or high priority. See the Documents page for further information.
- To schedule the document for the whole day (i.e., from 12:00am until 11:59pm), enable the "All day" toggle.
- Enable the "repeating" toggle to specify that the document schedule should recur on the selected day of the week until the schedule is deleted.
- If the document is not recurring, it will only appear at the selected time(s) on the selected date.
- To discard or delete this scheduled event, click "Delete Event", otherwise
- Click "Save" to add the event to the device schedule.
On desktop devices, this process can be simplified by left-clicking and dragging the mouse cursor to select a time range:
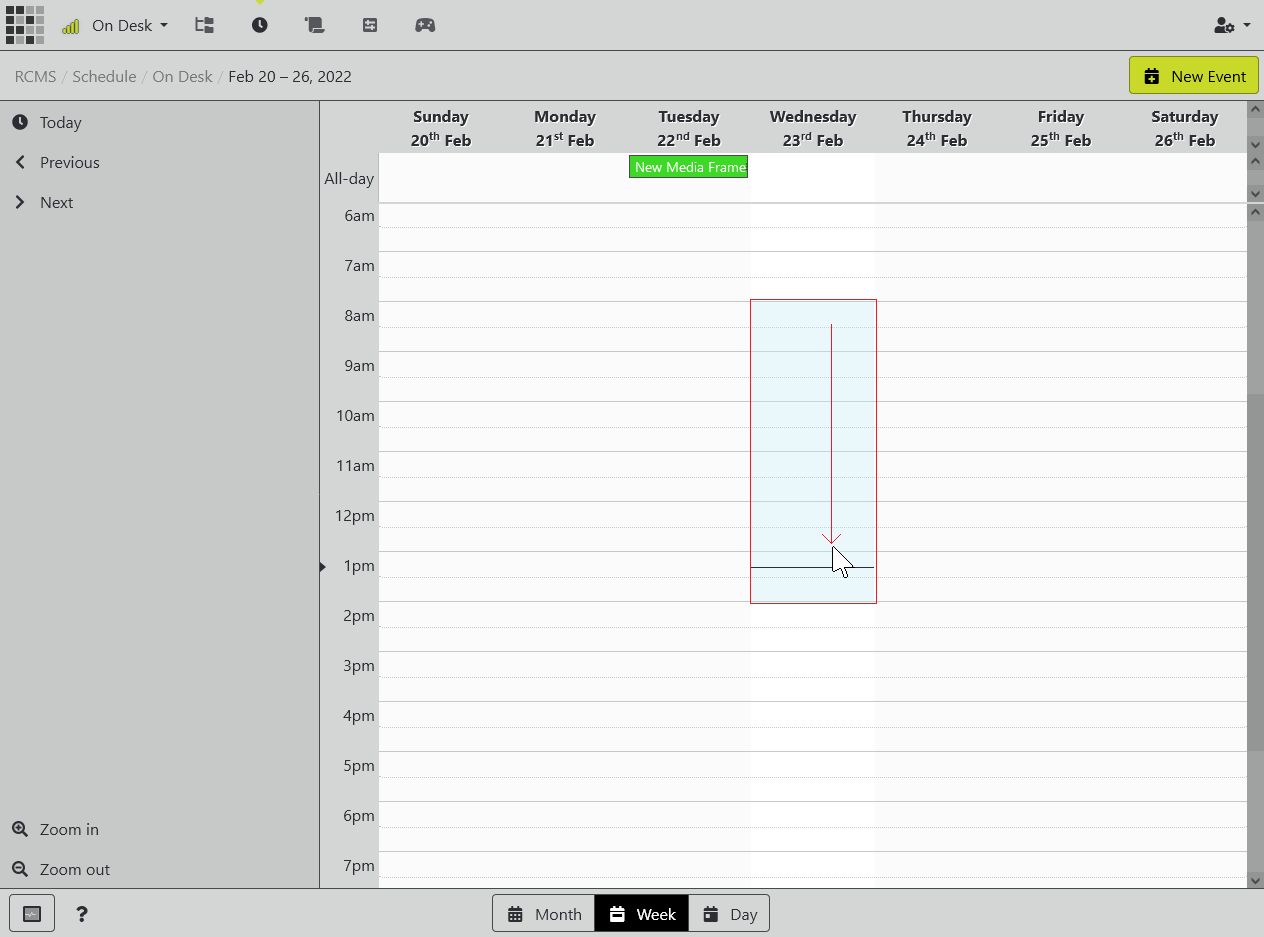
When a time range is selected, right-click the mouse to select a document. This will insert a non-recurring, normal priority schedule over the selected range.
Editing a schedule
To edit a scheduled event, either right-click the scheduled event on a desktop or long-tap on a mobile device. The following context menu will open:

- "Edit event" will open the schedule editor dialog.
- "Change document" will open the "select document" dialog to select a different document without modifying other document properties.
- "Duplicate" will create a copy of the scheduled event (including the selected document, priority, and whether it is repeating). The duplicated schedule can then be moved to a different time or day.
- "Edit document..." will open the document editor for the selected document.
- "Set to repeat/not-repeat" will toggle recurring mode for the selected event.
- Set the document's priority to low
- Set the document's priority to medium/normal
- Set the document's priority to high
- Delete the scheduled event (not the document)
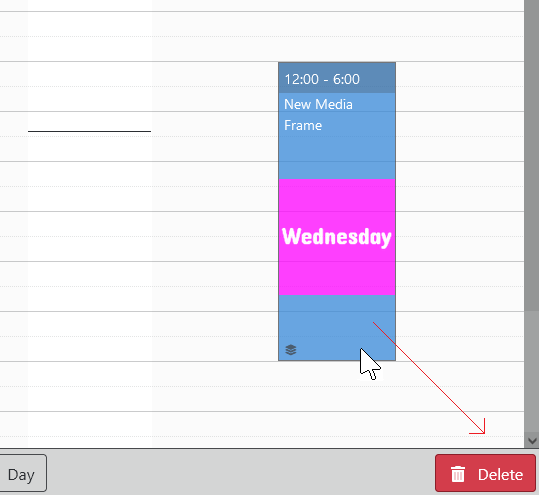
Deleting a schedule
Non-recurring events will automatically be deleted after they have passed when they are 1 week old. To manually delete a scheduled event, either select "Delete event" from the context menu, or drag the scheduled event to the "delete" button at the bottom right of the screen: